

¡Hola! Welcome back to another lesson in our series about using the Microsoft Power Platform to create solutions using low-code automation. This series is designed to empower you to break away from repetitive tasks and focus on what matters.
In our last few posts, we created several workflows using templates and a few optimizations, and in this episode, we will learn something a touch more complex, with one goal: how to trigger a flow from your phone using a button. We will also build a flow from scratch.
Listen to a recording of this post:
The scenarios we will use are simple. In the first scenario, I will look at the times when I am working on something and I find my groove. I want to make sure that I am not interrupted, especially if my schedule appears open. I could open my calendar app and create a calendar entry having to type a title and choose time and date on Outlook and then save the entry. By the time I have done this, I have become distracted and lost my train of thought. Another example of the first scenario is when I get called for an emergency meeting and need to quickly block my calendar for an hour.
The second scenario looks at waking up in the morning, feeling sick, and knowing you cannot make it to work. This is a time when you would need to write an email to your colleagues and boss to let them know you will be out, open your calendar and block it for the day. If you are super thorough, you would also make sure the calendar entry is there, and the message went out. Ugh. 😒
On the other hand, I could just unlock my phone, push a button, and be done. Back to being productive and creative, or going back to bed and focusing on healing and recovery.
As always, be sure to follow the Microsoft 365 Champions category  in this blog. You will pick up valuable information and tips on how Microsoft 365 can help you with teaching, learning, work and personal life, and how to become a hero with your peers as you share your newly acquired powers.
 ️
️
So, this is how we do it, with low-code.
First part
- Login to Power Automate.
- In the home page use the keyword “block” to search for existing templates.
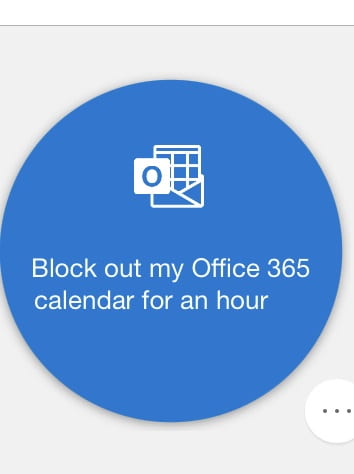
- You will find one which is applicable to this project: “Block out my Office 365 calendar for an hour”
🚩 IMPORTANT: notice that there are other templates that appear to do some of the things that we intend to do here, but they are designed for Outlook.com and we are working with Outlook 365. Stick to the 365 based solutions. - Choose the “Block out my Office 365 calendar for an hour”
- Once the template flow is complete, you will be able to customize it with a message for the calendar block, test it online and on your phone.
🎓 Learning Tip: Notice that in the start time and end time we use an expression.
Start time is set by the expression utcNow() , which is the time when the button was pushed,
and End Time is set by adding an hour to the curren time with the expression addHours(utcNow(),1)
Second part
Let’s build the “Out Sick” app from the ground up.
- Like before, login to Power Automate.
- In the homepage look at the left section and choose + Create
- You will see a section at the top that says Start from Blank.
Yes, this is the first build you will create without a template 🤩
Choose Instant Cloud Flow - In the pop-up window, give your flow this name: ” Out Sick ” and choose the trigger called ” Manually trigger a flow ” and click create
- You will see the building canvas with the trigger already populated. No need to change anything there.
Click on + New Step. - On the Choose an Operation block, type ” send message ‘ in the search field. The Actions pane will show several options.
- Choose Send an email | Office 365 Outlook
- The Outlook Send an email block will be added to your flow canvas.
Enter the email addresses of your team members and supervisor in the To: field
Enter ” Out Sick ! ” in the subject line.
Enter a message such as “I am not feeling well today. I am not able to make it into work today.” in the Body section.
🎓 Learning Tip: In order to not annoy people, especially your supervisor, enter your email in the To: field for testing and then edit in the appropriate names when you are ready to go into production.
You have now completed your notification part. Let’s block your calendar as the next step - Click on + New step
- In the Choose Operation box, type create event in the Search Field
- Choose Create event | Office 365 Outlook
- The Create Event block will be added to your flow canvas
- In the Calendar id click on the pulldown arrow and select “Calendar” . This is your work calendar. You may see others such as Birthdays or US Holidays depending on your configuration, but those would not be good choices.
- Type Out Sick or Out of the Office in the Subject field
- For Start time we will borrow from what we learned above.
Click in the field. The fx symbol will appear.
Add the expression utcNow() in the expression box and click outside of the Create event block - For End time we will add 8 hours from start time, again using a function we saw above
- Click in the field. The fx symbol will appear.
Add the expression addhours(utcNow(),8) in the expression box and click outside of the Create event block
Notice that we changed the ,1 to an ,8 from the previous example since we are adding 8 hours in this flow. - Finally select the proper Time zone from the drop down. For Texas State, it should be (UTC-6:00) Central Time (US & Canada)
You have now completed the notification piece and the calendar blocking piece. Nice work 🎆
Now we will add a convenience function. Once the email has been sent and the calendar has been blocked, I want a mobile notification to be sent back to my phone saying it has all been taken care of. That way I do not have to make sure all of this happened by checking my calendar and my sent messages. I can go back to my chicken soup and focus on resting and recovering. 🍲 💉💊 - Click on + New Step
- Enter Notification in the Search field of the Choose an operation block
- Choose the Send Mobile Notification action.
- The only required field in the Send me a mobile notification block is Text.
Enter a short message for yourself there. Something like “Out Sick flow complete” - Run the flow checker on the top right.
- Save.
- You can test on your phone or on the web and the adjust then recipients when you are ready to go into production.
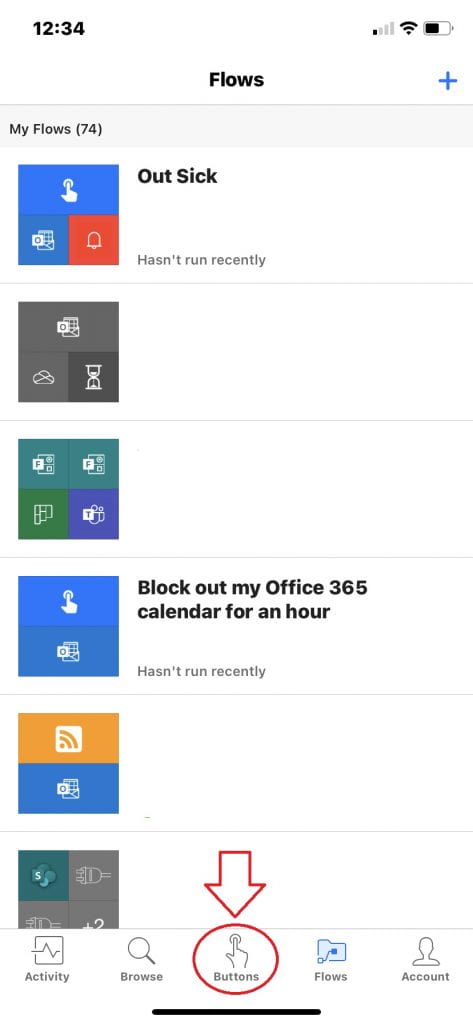
Running the Button flows
- Get to your Power Automate app on your mobile device
- Click on the buttons menu and select the button for your flow
So lets recap, because, by completing this build, you have learned a lot of new stuff.
- You learned that you can trigger a flow manually from your phone.
- You learned about expressions as parts of what defines a flow.
- You build a flow from the ground up using a button trigger.
- You learned to trigger those flows from your phone, at the push of a button.
- You built a flow from the ground up.
I say you deserve a celebration! 🍰
If you missed our previous lessons, be sure to look at these posts:
- “Third lesson in low-code: You want me to convert how many files to PDF?”
- “Never miss an important email from your boss!”
- “I want to create my own tech solutions, but I am not a coder. Where do I begin?”
I also recommend our post called “I want to develop an app, but….”
Dr. Carlos Solís is Associate Vice President of the Technology Innovation Office.
